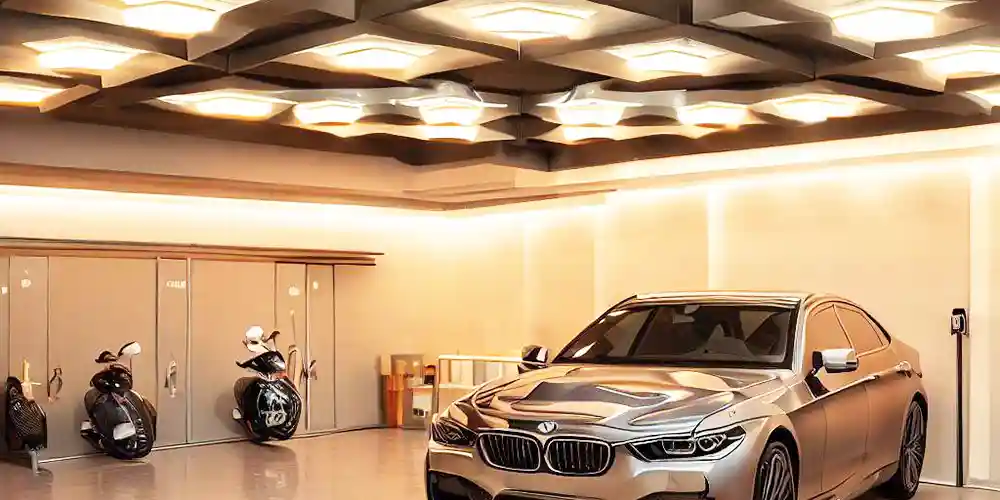
In the realm of innovative DIY projects, DIY hexagon garage lights stand tall, embodying a perfect marriage between a cutting-edge aesthetic and functional utility. As more homeowners seek to infuse unique elements of style into their spaces, this project offers a transformative upgrade to the mundane lighting fixtures traditionally seen in garages. This guide seeks to unravel the intricacies of DIY hexagon garage lights, paving the way for an illuminating and aesthetically enriching experience.
Unraveling the Charm of Hexagon Garage Lights
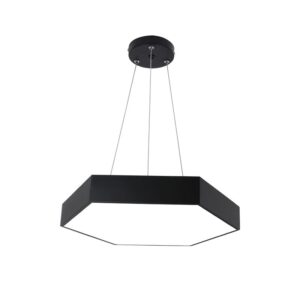
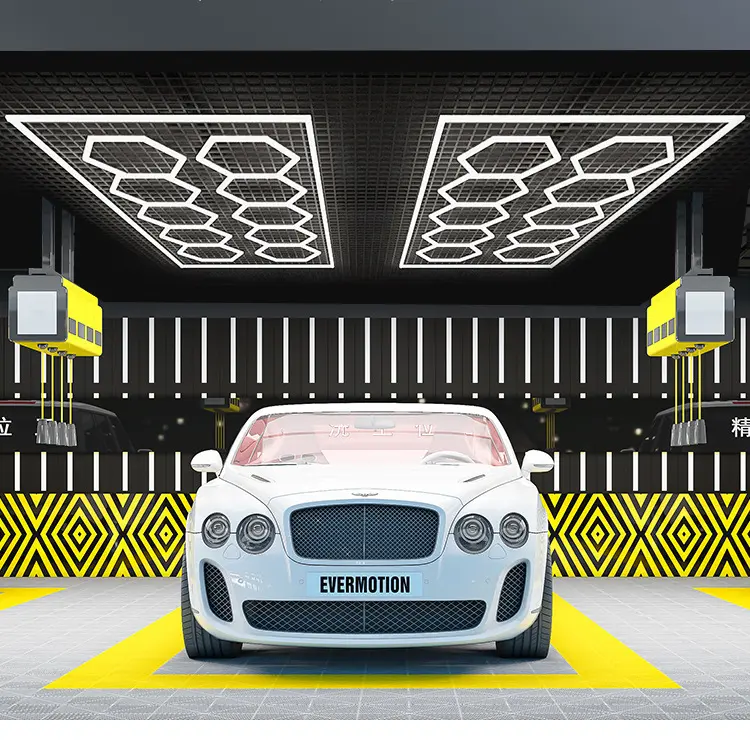
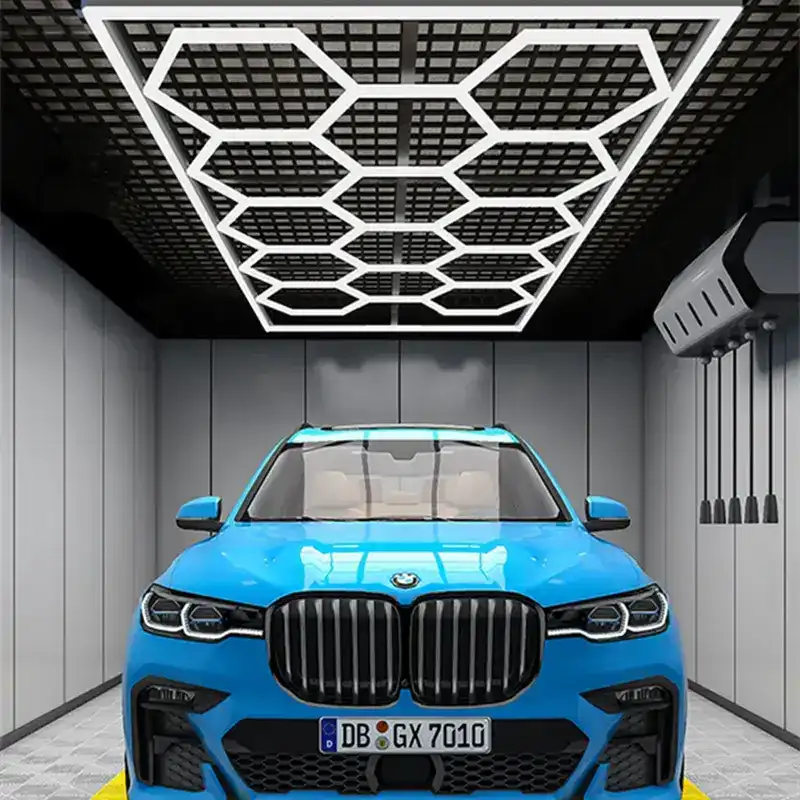
Taking inspiration from geometric principles, DIY hexagon garage lights bring a sense of modern elegance to your garage. With six sides to play with the light’s dispersion, these fixtures infuse your garage with an even and radiant illumination while complementing the space’s aesthetic appeal. The result? A captivating marriage of form and function, where the garage transcends from a functional storage area to a vibrant, inviting space.
Selecting the Right DIY Hexagon Garage Lights
Choosing the right DIY hexagon garage lights isn’t a task to be taken lightly. Several factors come into play, from your garage’s dimensions to its architectural layout, and even the ambiance you wish to create. Here’s what to consider:
Garage Size and Ceiling Height: Your garage size and ceiling height are significant determinants of the number and placement of hexagon lights needed. A large garage with a high ceiling may demand multiple fixtures for full illumination, while a smaller garage may require fewer lights strategically placed.
Light Specifications: Look for DIY hexagon garage lights that offer high lumens for sufficient brightness, energy efficiency for sustainability, and longevity for durability. LED lights tick all these boxes, making them an excellent choice. They also offer a wide color temperature range and dimmable options for added control over the garage’s lighting mood.
Aesthetic Preferences: Hexagon lights come in various designs, sizes, and finishes. Choose a style that complements your garage’s decor and reflects your taste. The harmony between your chosen lights and the overall aesthetic can enhance the garage’s appeal.
DIY Hexagon Garage Lights: A Step-By-Step Guide
The installation of hexagon garage lights is a manageable task for DIY enthusiasts with some understanding of electrical work. However, it’s paramount to remember that safety comes first when dealing with electricity. Always turn off your power supply before starting the installation. If you’re uncomfortable or inexperienced with electrical work, consider hiring a professional.
If you’re ready to venture into this DIY project, here’s a detailed, step-by-step guide:
Plan the Layout: Start by determining where you want your hexagon lights on the garage ceiling. Mark the positions to guide you on the number of fixtures you need and their placements for optimal illumination.
Install the Mounting Brackets: Based on your layout, proceed to install the mounting brackets for each light. This usually involves drilling holes in the ceiling at the marked spots and fastening the brackets using screws.
Wire the Lights: Next, wire each hexagon light fixture to your home’s electrical system. Typically, the process involves matching the black wire from your fixture, known as the hot wire, with the corresponding black wire in your ceiling. Additionally, the white (neutral) wire from your light fixture should be connected to the white wire from your ceiling. The green wire, which serves as the ground wire, should be linked to the bare copper wire or the green wire in your ceiling.
Mount the Lights: Once the wiring has been successfully established, your next task is to affix the hexagon lights onto the previously installed mounting brackets. Ensure that each light is secure and properly aligned according to your initial layout.
Test the Installation: With all fixtures installed, it’s time to turn the power back on and test your new hexagon garage lights. Ensure each light is functioning correctly and providing the desired brightness level.
The journey of installing hexagon garage lights is as gratifying as the resulting transformation. By fusing modern aesthetics with functional needs, these fixtures significantly upgrade your garage, transcending it into a well-lit and visually pleasing space.
While the rewards of a DIY project like this are immense, always prioritize safety, especially when dealing with electrical installations. Engage a professional electrician if any part of the process seems challenging.
In essence, installing DIY hexagon garage lights is more than just a lighting upgrade; it’s a transformational journey that breathes life into your garage while allowing you to unleash your creative potential. So, why wait? Dive into this exciting DIY project and give your garage the illumination makeover it deserves.